Management Console
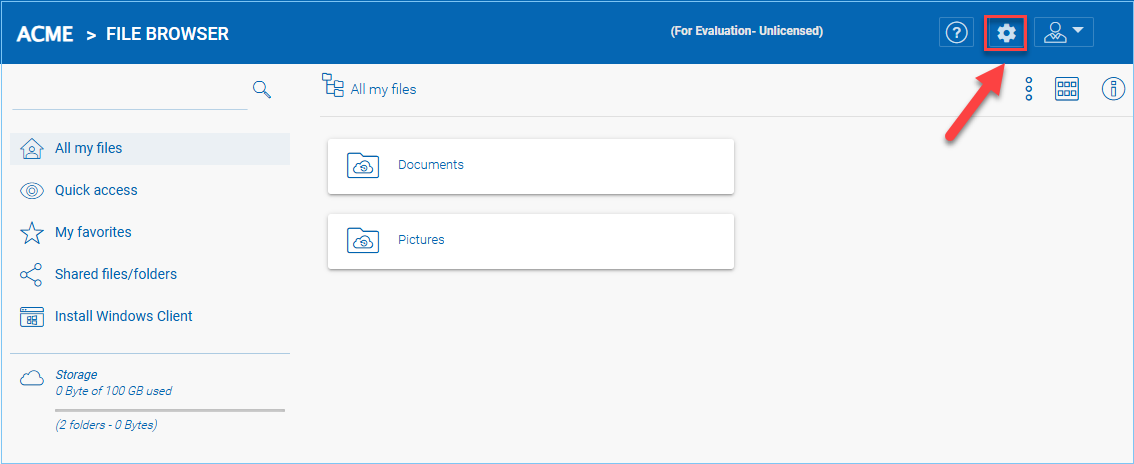
If you are logged in as the Tenant administrator, access the Management Console by clicking the gear icon on the top right of the “File Browser” view.
The Tenant Administrator will see the files and folders view by default upon initial login.
Warning
If you are the cluster administrator, you may not see the “Management Console” icon. Instead, you can manage the default tenant from the Cluster Manager -> Tenant Manager and click through to manage the default tenant.

Here is the Tenant Management Console.
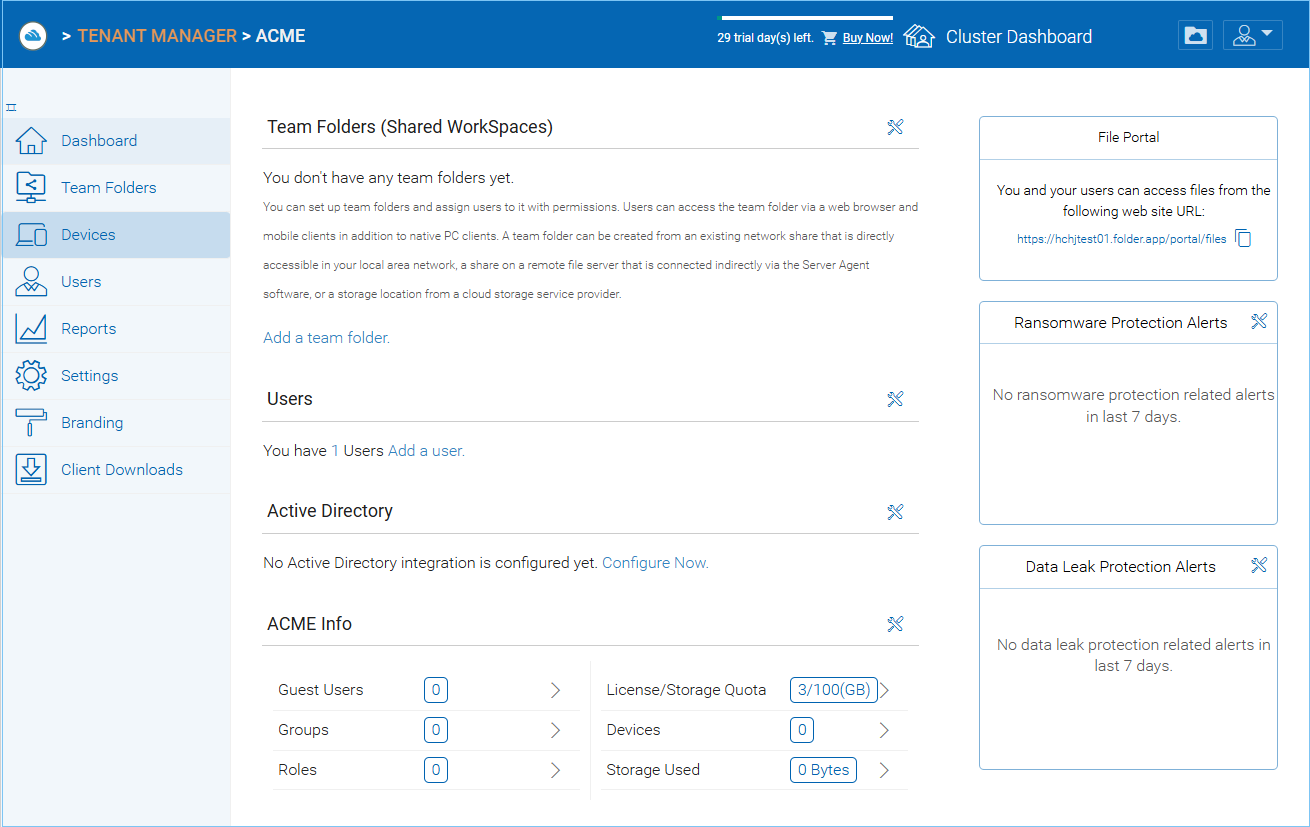
Please reference the CentreStack Admin Guide for complete details about Tenant administration.
Here are a few points that are more important during the deployment phase.
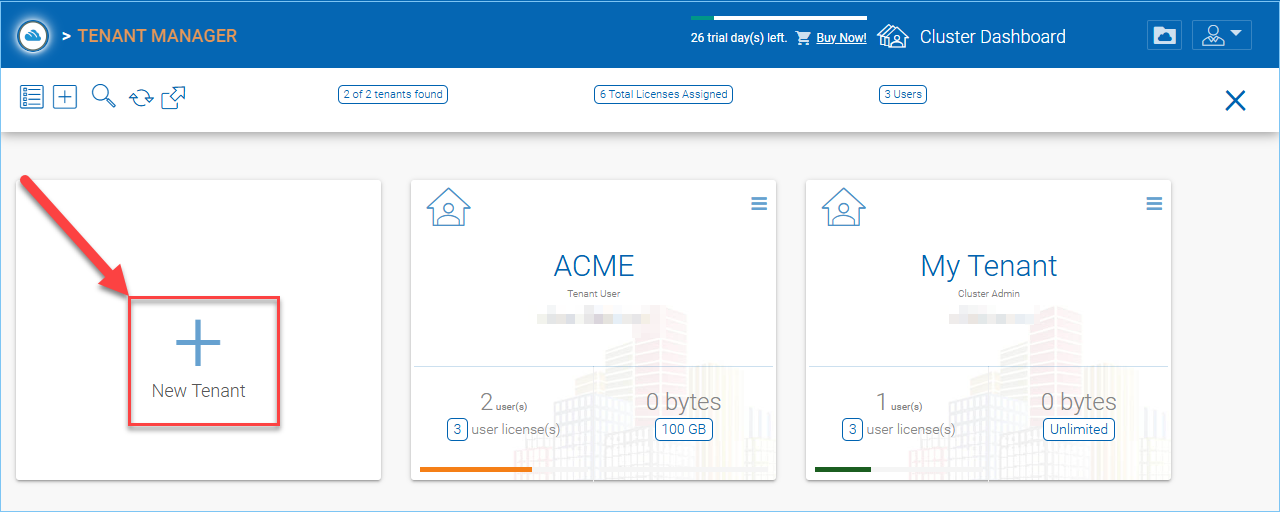
Add Tenant
You can add a tenant by clicking the ‘New Tenant’ Button in the Tenant Manager
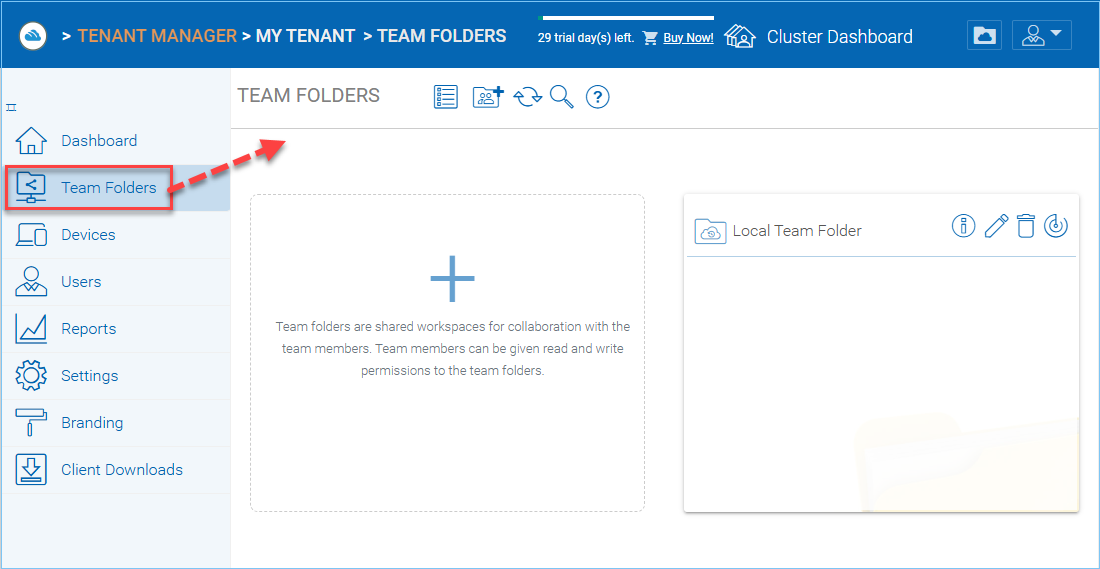
Team Folders
Team Folders are created by the tenant admin. The users that can be assigned to the team folders are the team users within the tenant. Each team user can be assigned read or write permissions to the team folder. For the team users that are not assigned with a specific team folder, the team folder will not show up. Team folders users can also be assigned the “Owner” permission. The owner permission allows the “owner” to maintain and manage the team folder permissions.
You can navigate to the Team Folders by clicking on the “Team Folders” tab from the left side menu of Tenant Manager.
Here is the Team Folders page.
User Manager
In the user manager, you can create users, import users from Active Directory over LDAP or import users from Active Directory via Server Agent. Click on the “Users” tab from the left side menu of Tenant Manager. Then click on “Create or Migrate Users”.
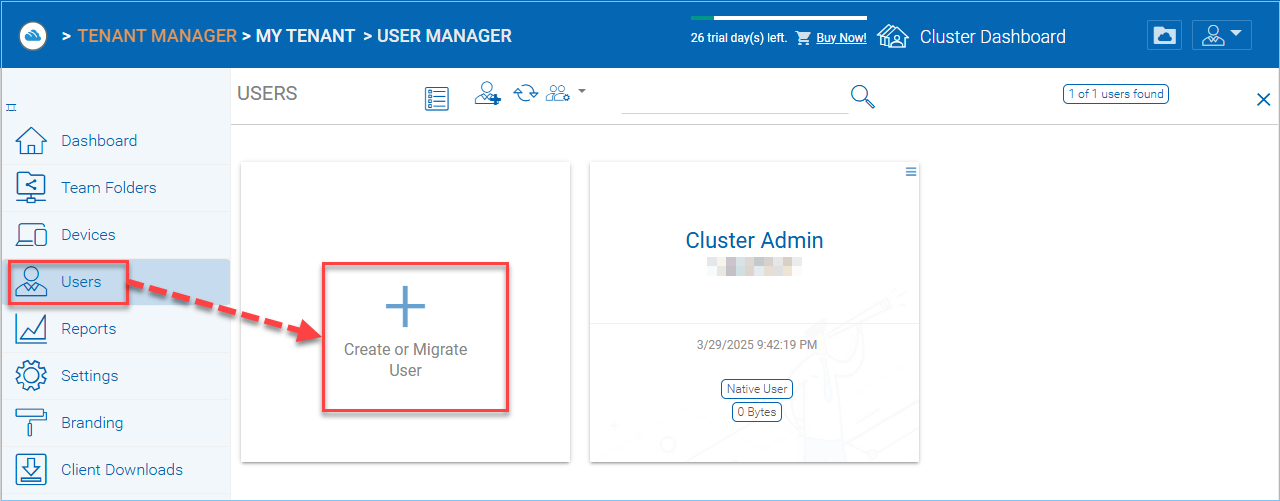
This should take you to a menu of options to add a new user to the tenant.

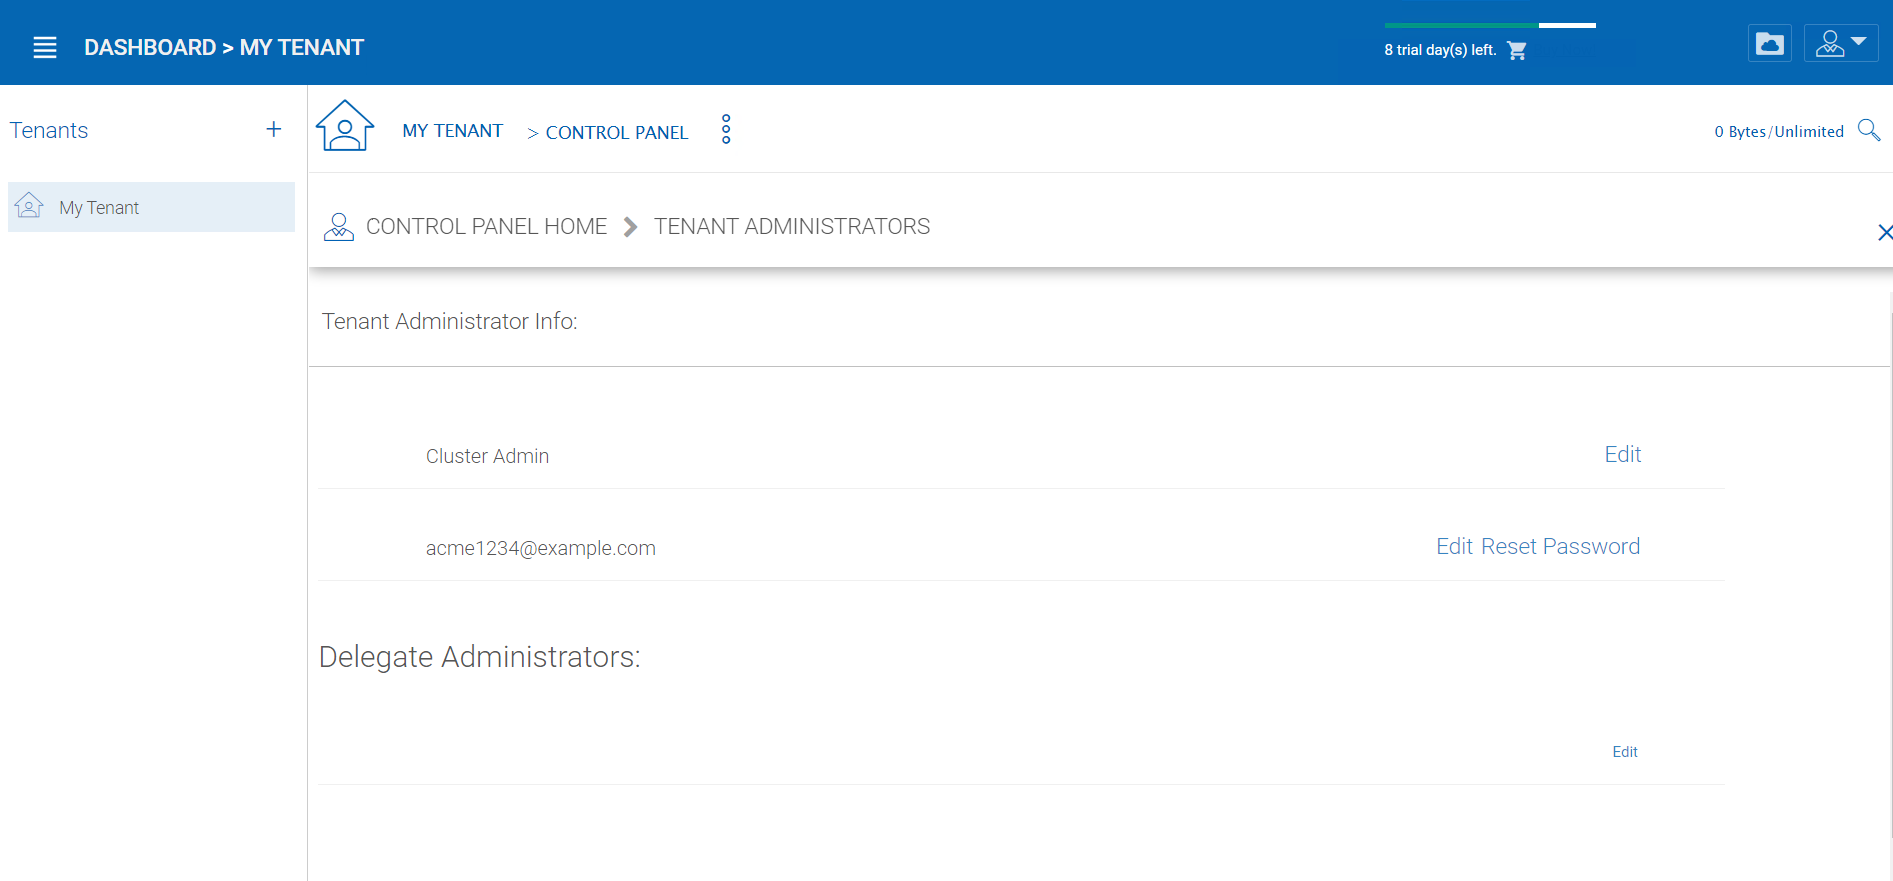
Delegate Administration
You can add full delegated admin to the list of “Cloud Administrators”. Once you reach the tenant dashboard, click “Settings” from left side menu, and then go to the “User Account & Security”. In “User Account & Security”, Click on “Tenant Administrators”.
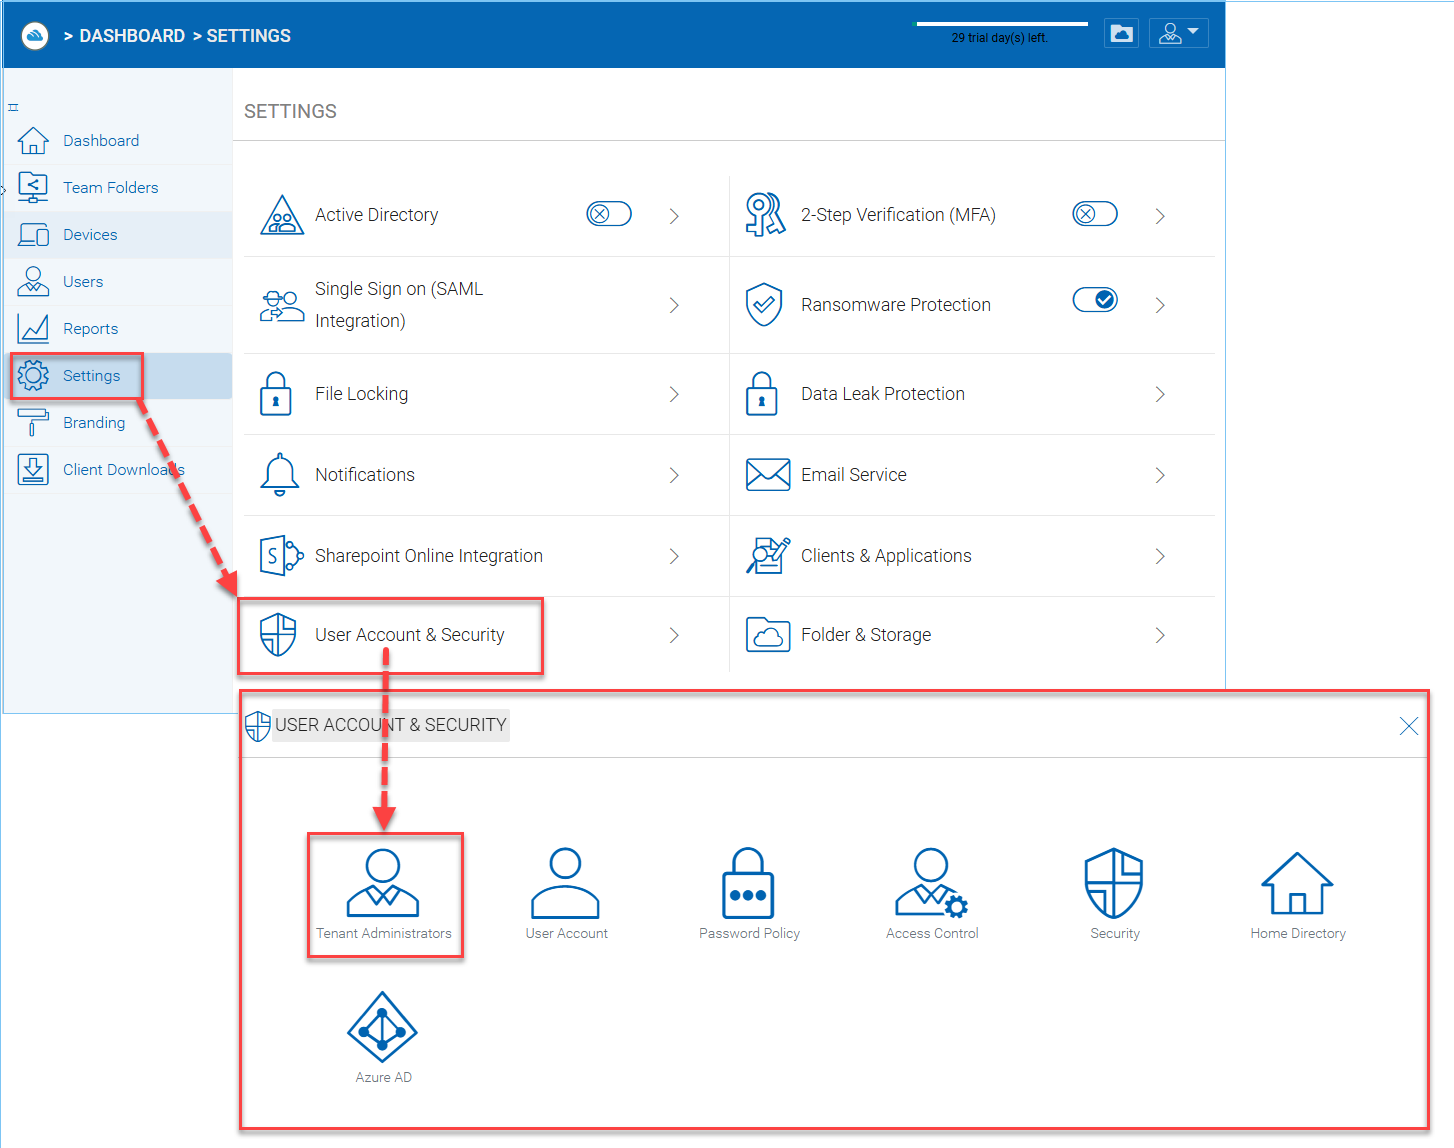
At the bottom of the Tenant Administrators page, you can designate the delegated admin.
Active Directory Integration (Optional)
It is optional to setup the Active Directory Integration. You can get to the integration page from the Management Console -> Settings -> Active Directory Settings. The active directory setting here refers to local Active Directory with LDAP integration. For remote Active Directory, server agent can be used to connect remote file server folders and remote Active Directory.
Once you reach the tenant dashboard, click “Settings” from left side menu, and then go to the “Active Directory” option.
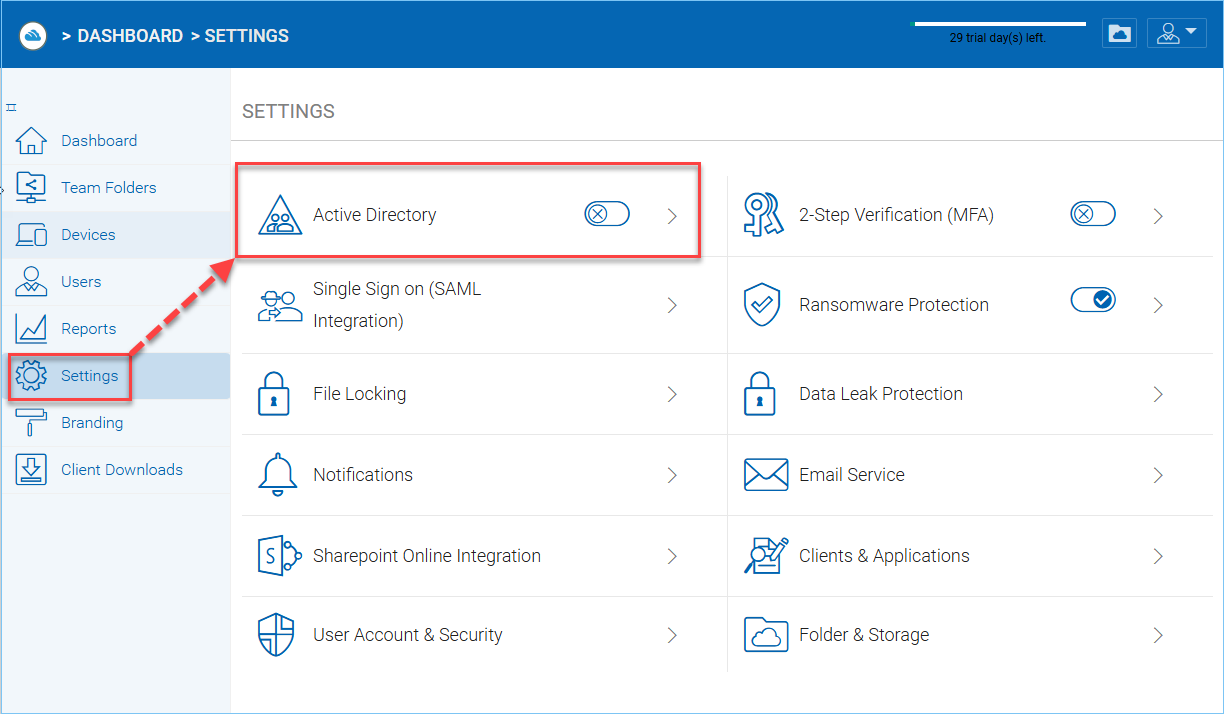
This will take you to the Active Directory Page. After you turn on the switch and enable Active Directory Integration, you can fill in your information for Active Directory.

Note
If this specific tenant’s Active Directory is at a remote location, please use the CentreStack Server Agent to connect the Active Directory (No need to use LDAP over Internet WAN connection).
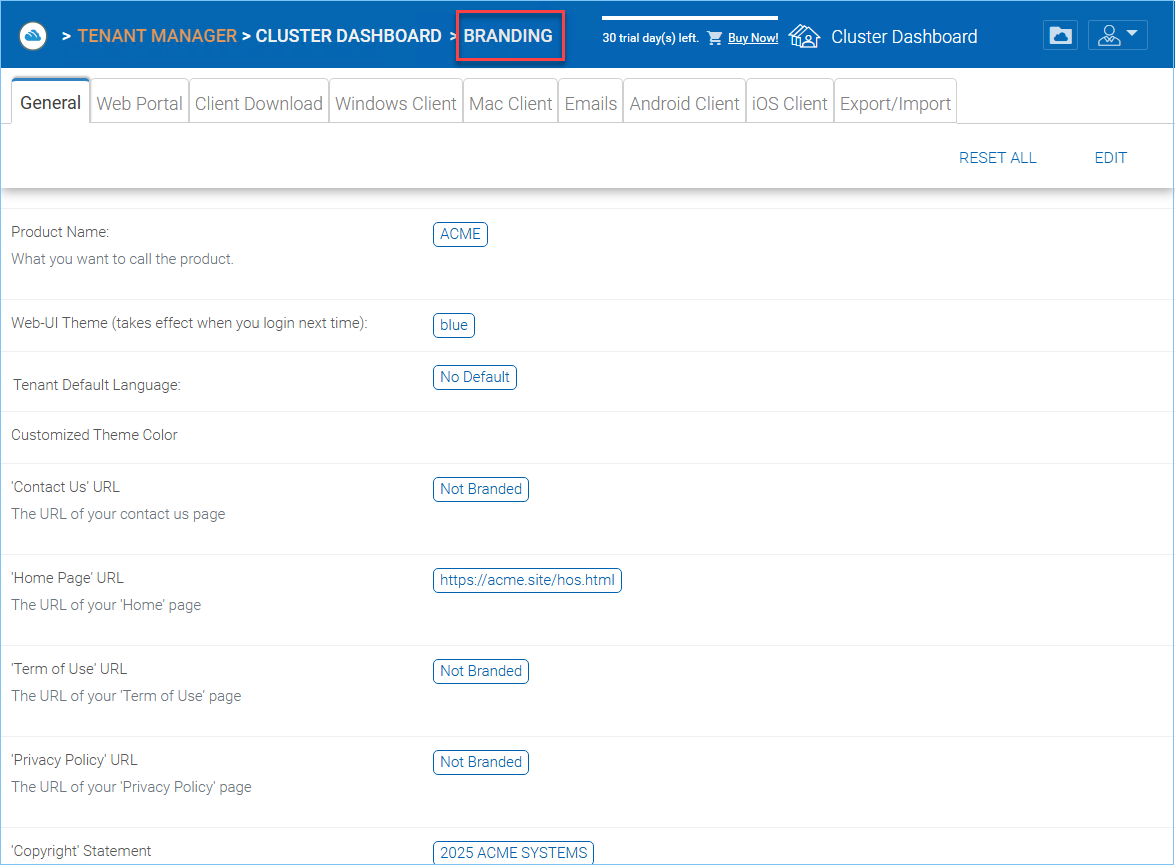
Branding
You can brand the web portal, Windows and Mac clients, iOS and Android Applications.
The self-service branding starts with the “Cluster Manager”. In order to start the branding, you will login to the web portal as the Cluster Administrator.
After you login to the web portal, click to the “Cluster Branding” Pages.
Please reference the “Cluster Branding” section in the Admin Guide for the self-hosted CentreStack server.