Enable SSL – Install SSL Certificate
Note
Assuming that you have already setup your DNS to point to a DNS name connected to the CentreStack server and an SSL certificate already purchased for the DNS name. If not, you can acquire an SSL certificate from your SSL vendor.
We recommend using https://www.ssllabs.com/ to test your SSL setup because the SSL Labs site will produce a report on whether the SSL is compatible with all devices such as iOS devices.
You can also use openssl to check the SSL certificates and whether or not the whole certificate trust chain is completely installed on the server side.
openssl s_client -connect server.yourwebhoster.com:443
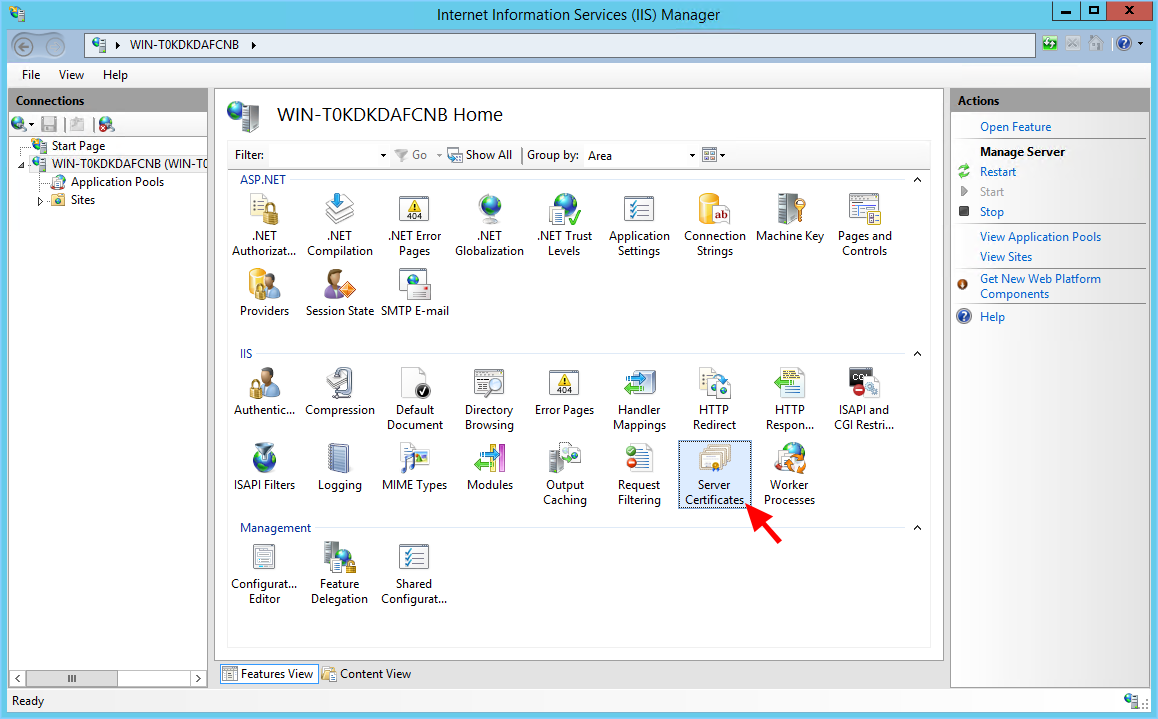
You will install the SSL certificate using the IIS Manager. Look for “Server Certificates” and double click on it.

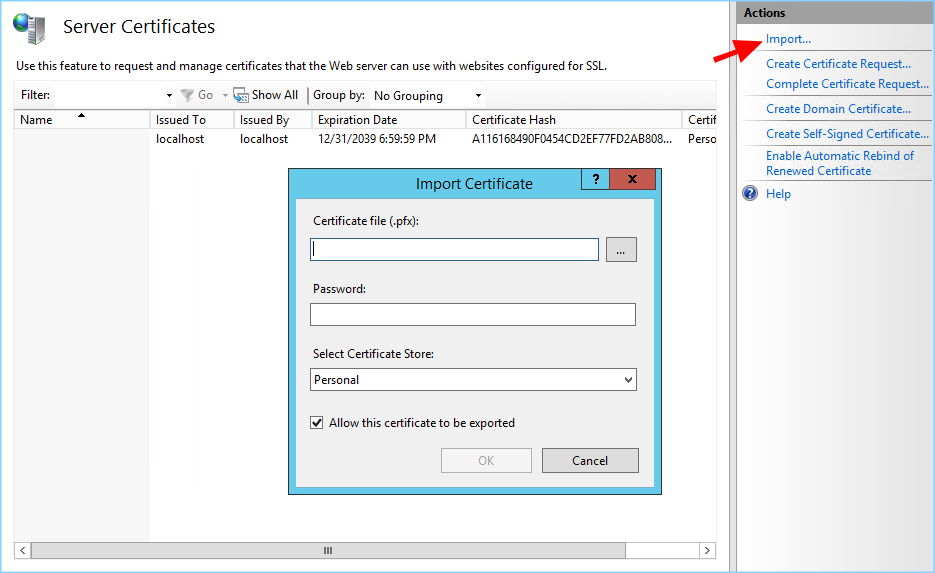
Click on “Import” to import an existing SSL Certificate. Leave the Certificate Store as “Personal” or “Web Hosting”, either option is fine.


Verify that the certificate is available:

You can also verify the SSL certificate using the MMC/Certificates snap-in (Local Computer).

Now you can bind the “Default Web Site” to the SSL certificate for HTTPS. Right click on the “Default Web Site” and select “Edit Bindings”.

At the binding dialog, edit the HTTPS binding.

Now, change the SSL Certificate binding drop-down to the imported SSL certificate.
