Sharing
Sharing Files And Folders
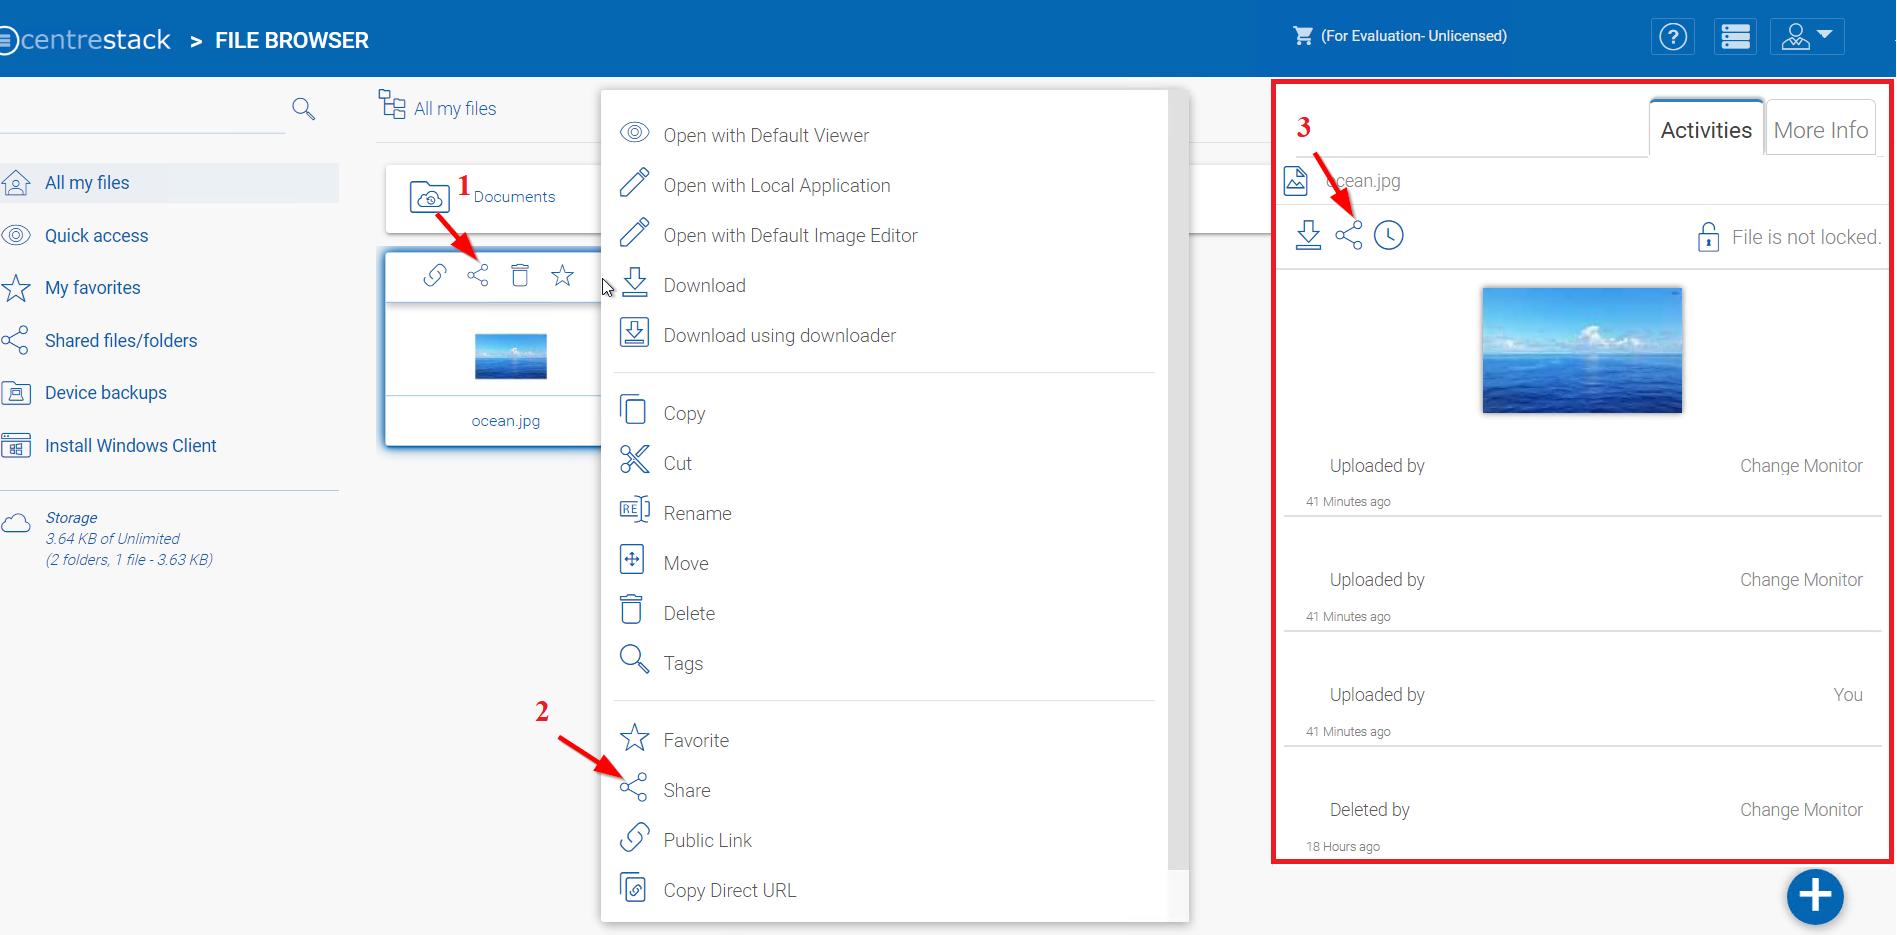
File Sharing
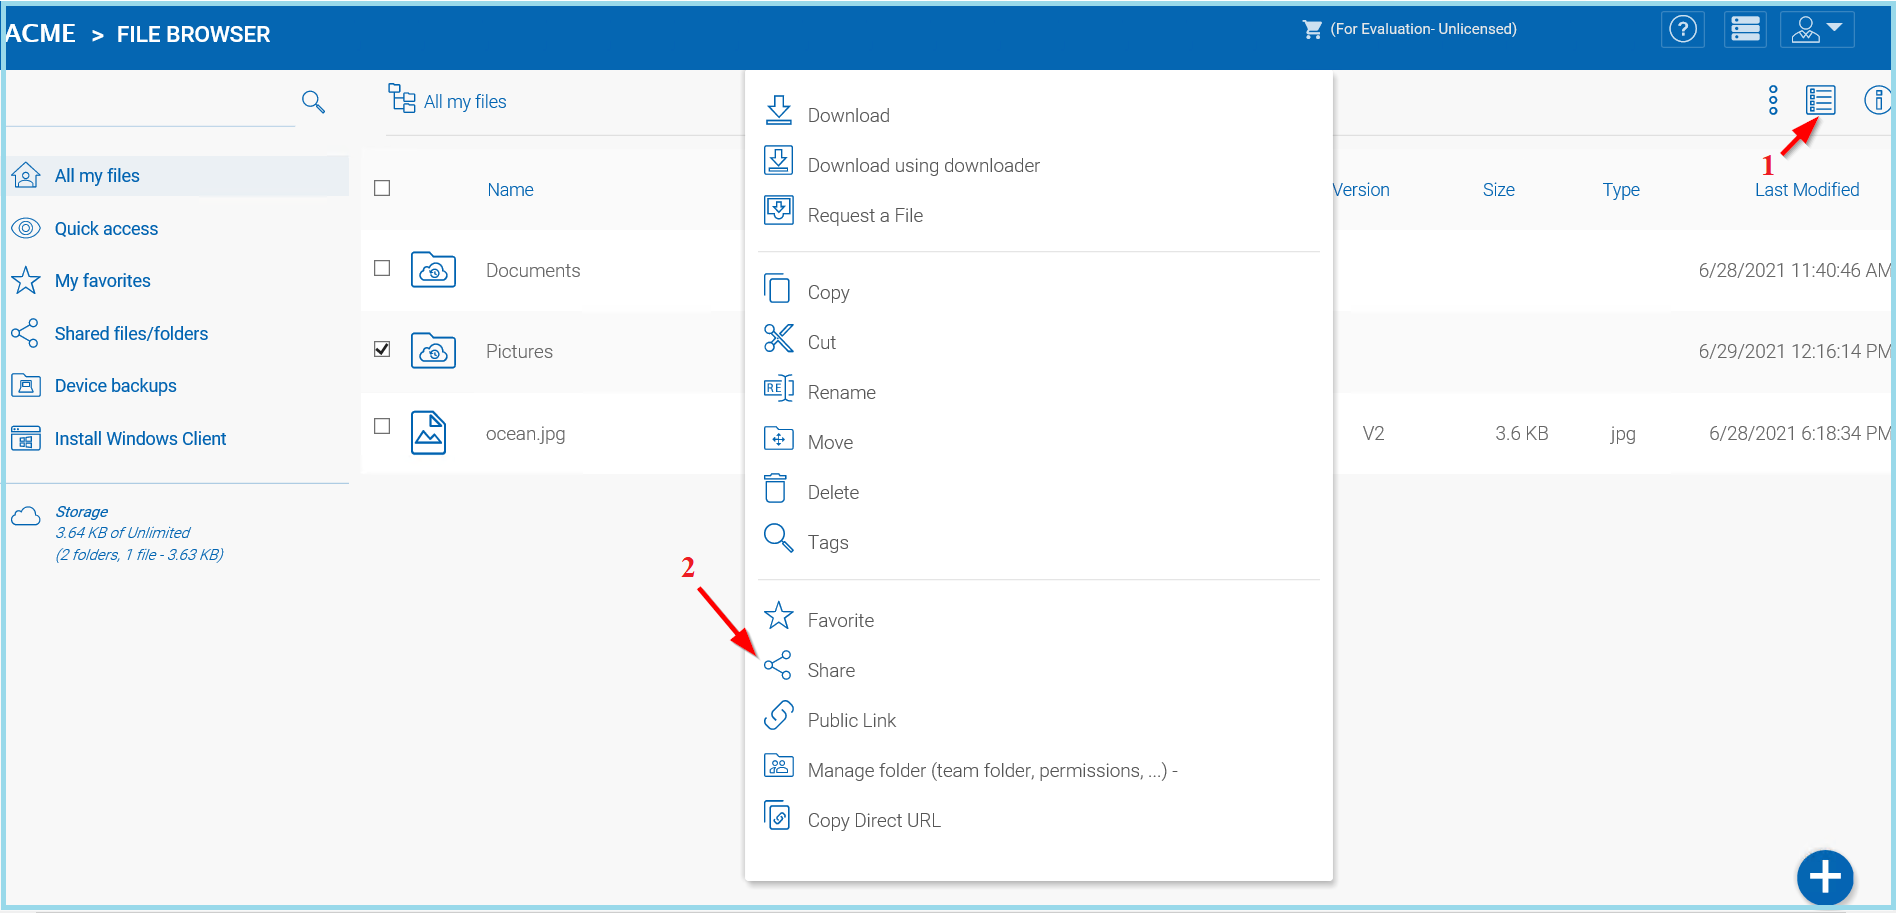
To share a file, click it and select the Share icon (1)revealed in the header of the file. You can also right click the file and select Share (2) in the context menu. Once the file is selected, if the right panel is open(click the encircled “i” button), there is a Share link (3) there as well.
SHARING FILES
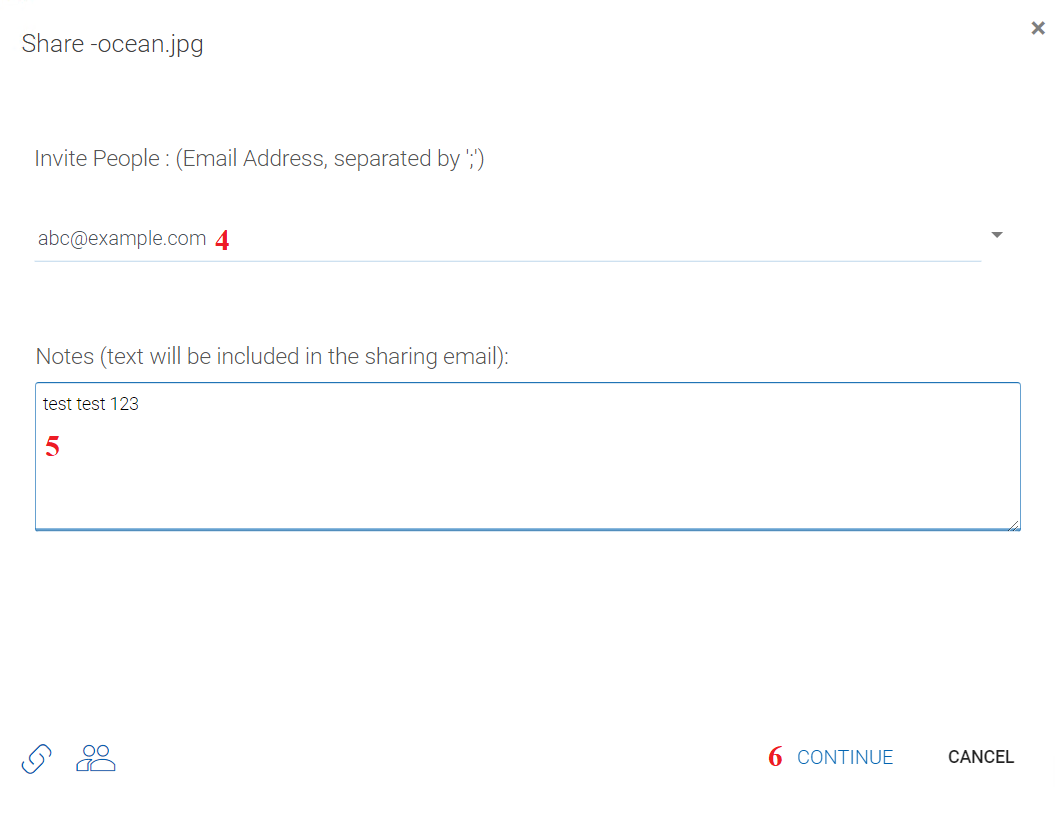
After clicking ‘Share’ above, in ‘Invite People’ window, click the email field (4) and enter email addresses seperated by semicolons (;) for anyone that needs access to the file. You can also add notes (5) if required. Click CONTINUE (6).
INVITE PEOPLE TO YOUR SHARE
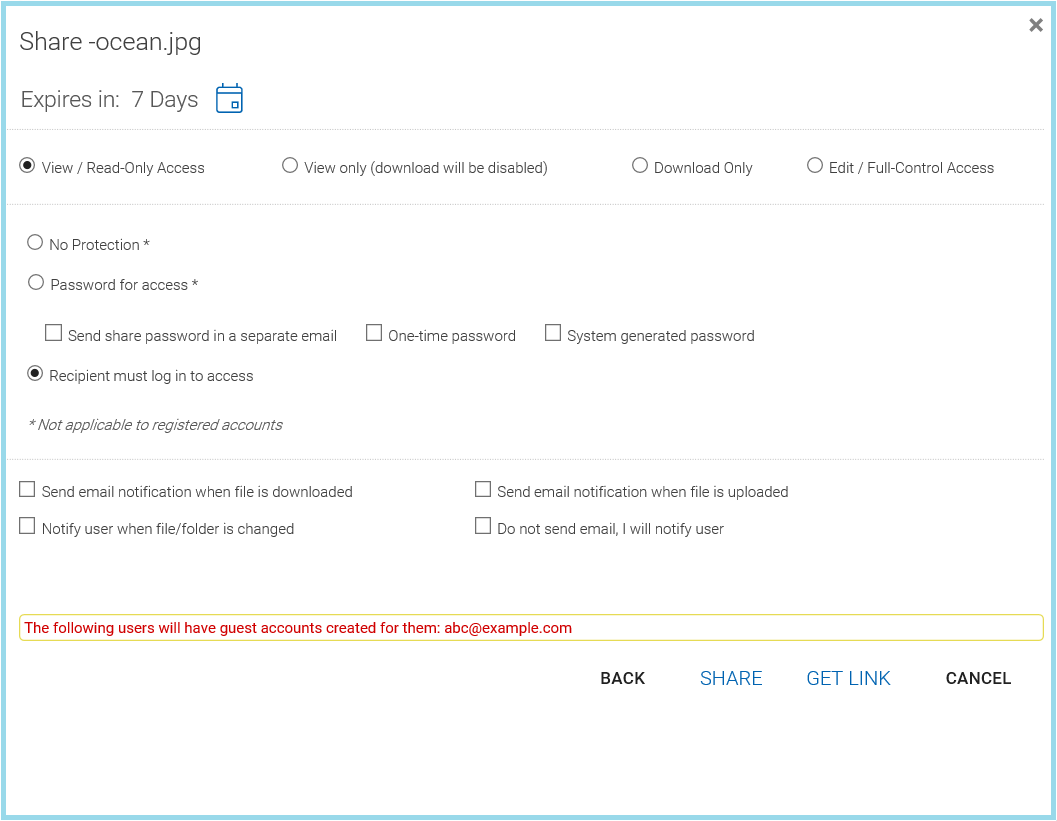
On the second share window you have access to the share options panel where you can make important decisions such as how long you want the share to be active and how much control you want to give the user (e.g., read only, full control access). You can also make this share available to the public by get
SHARE OPTIONS PANEL
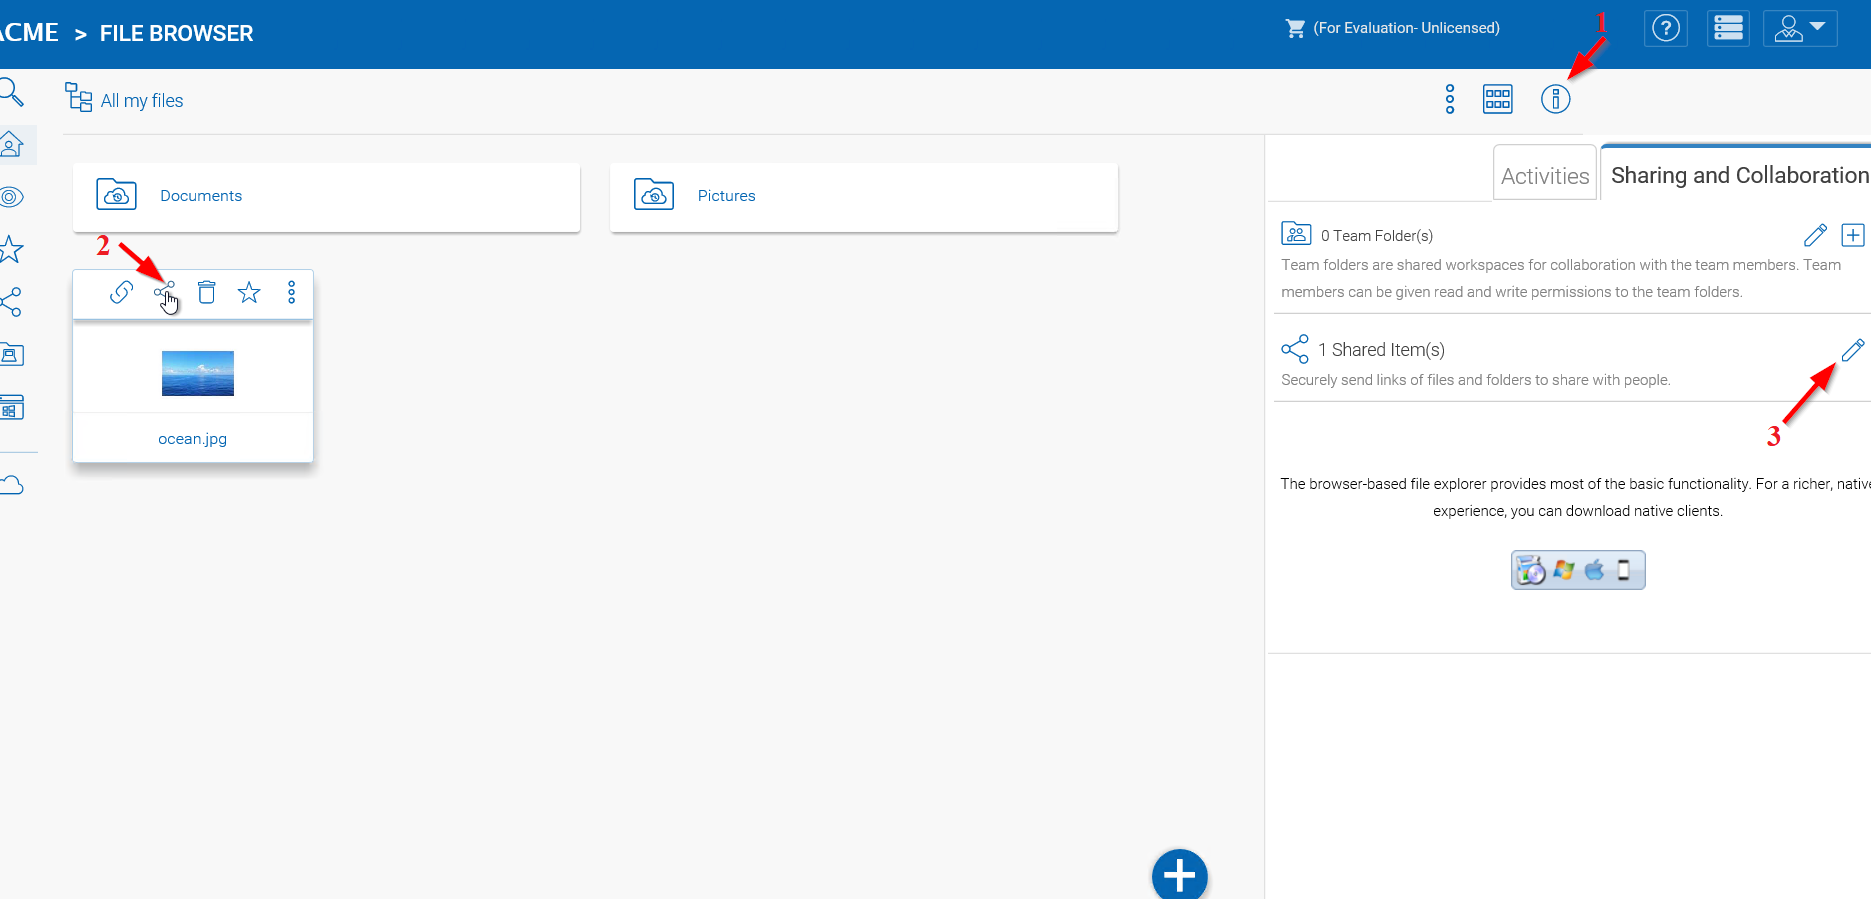
You can access previously shared items by clicking the share icon (2) on a folder of file. Other shares can be accessed by opening the right panel (1) and clicking the edit button (3) next to the “Shared Items” option.
ACCESSING SHARED ITEMS SETTINGS
Folder Sharing
In this example, the icon view has been changed to detailed view (1) of the files in this folder. To share a folder, mouse-over it and select the Share icon (2) in its row. You can also right click the file and select ‘Share’ in the context menu.
SHARING FOLDERS
Removing shares
During share setup, a user can define its expiration date. Once the share expires, other users will no longer be able to access the shares.
Users can also delete the share manually. First go to the Drive Root (1).
To delete a user’s access to a share, open the right panel click the “Manage” icon (2) on shared items. In the next panel choose the item you wish to modify, then in the pop-up window, click the Delete icon (3) to remove this user’s permission from the share.
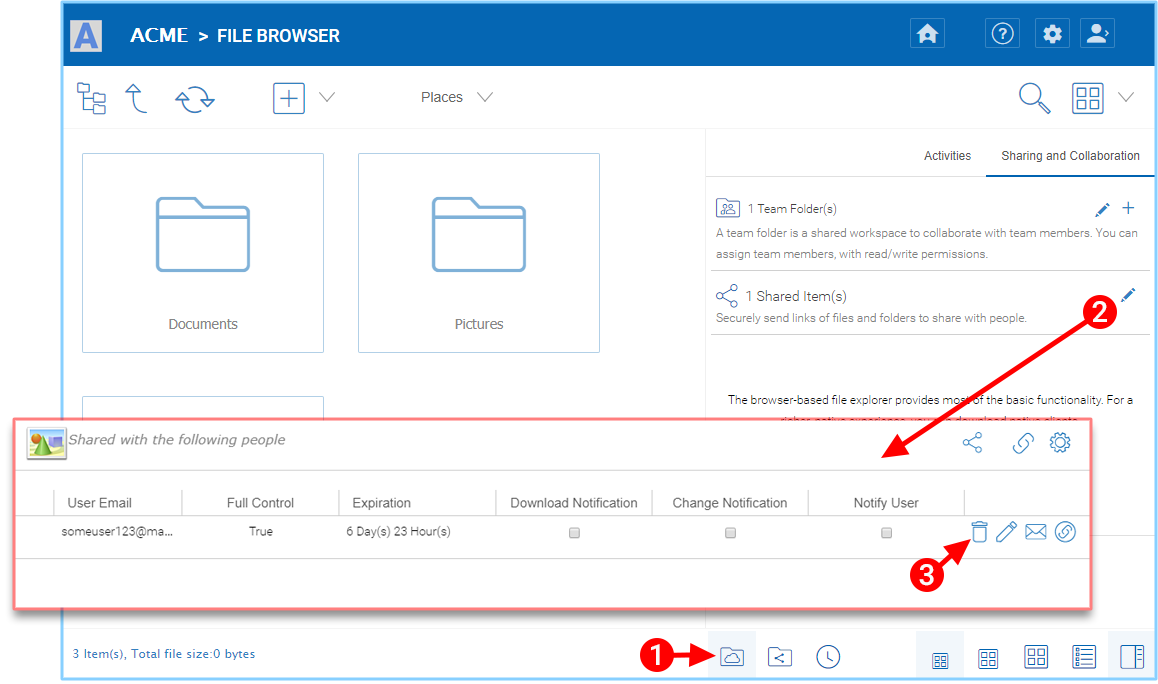
DELETING A USER’S PERMISSION
Accessing ‘Files/Folders Shared With Me’
When a file or folder is shared with the user, he/she will get an email. The link in the email can be used to open the file or folder.
If the user has a CentreStack account with the given email address, the shared files and folders will appear under the ‘Files shared with me’ folder, in both the CentreStack Web Portal and CentreStack Desktop App.
Web Portal
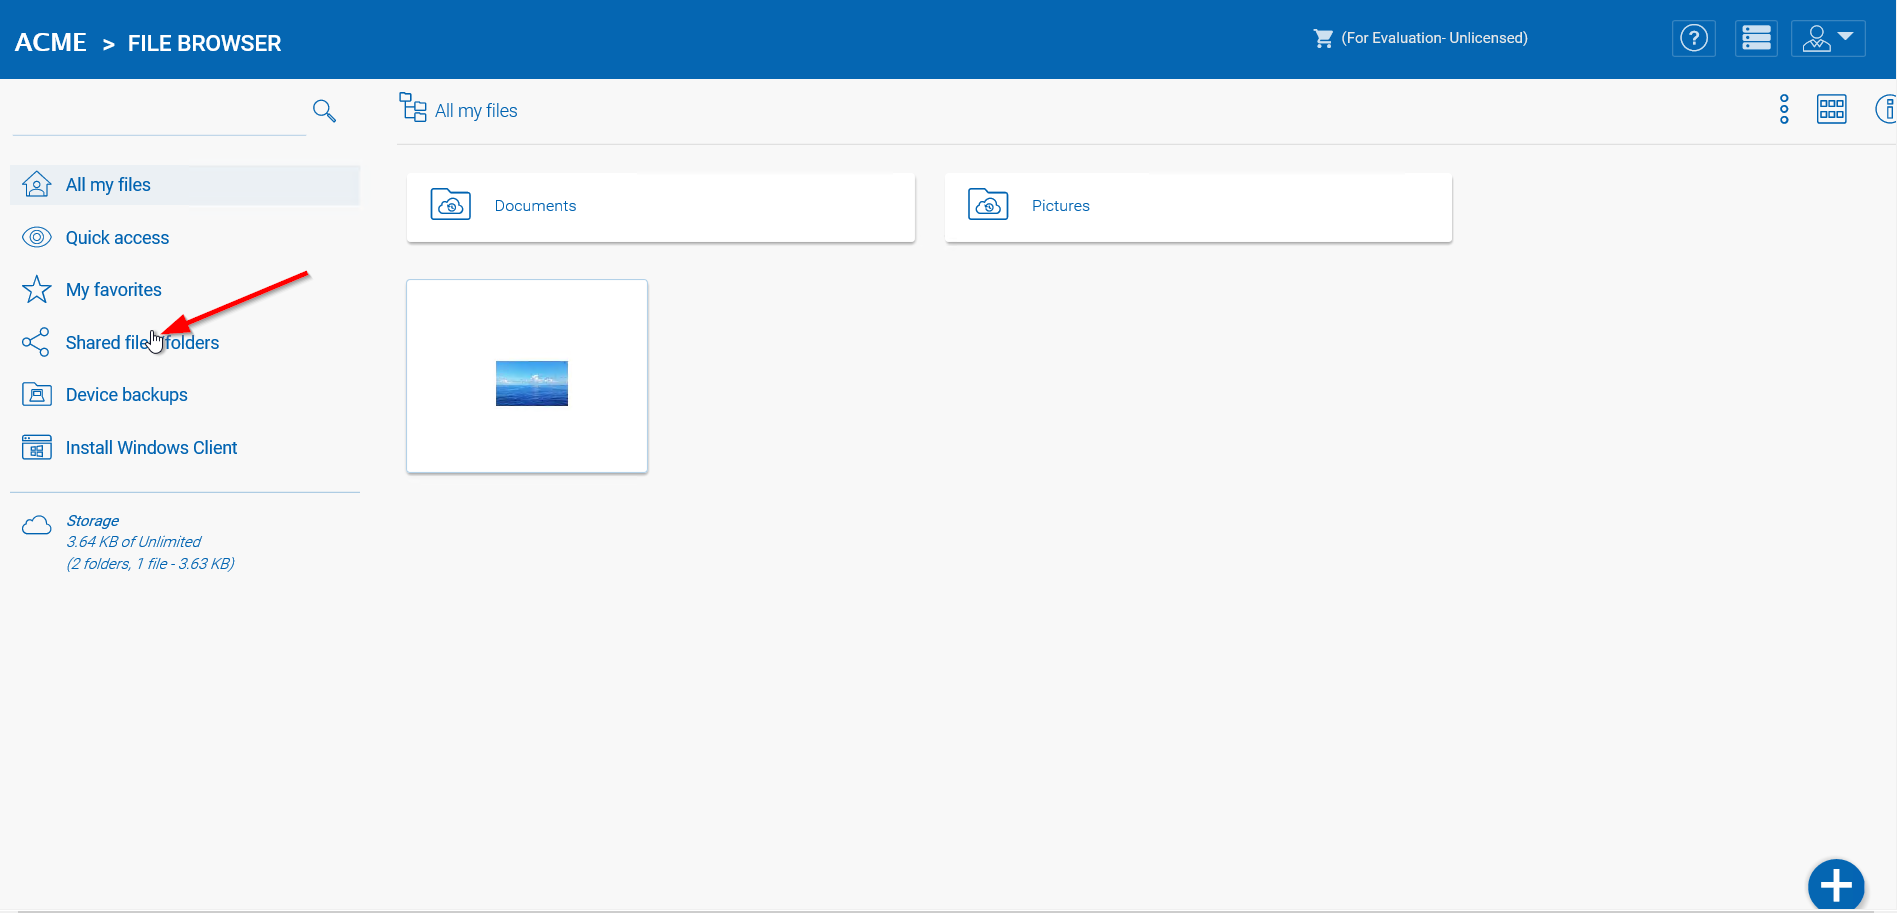
You can access shared files by clicking the “Shared files/folders” button in the “File Browser” view of the Web Portal.
WEB PORTAL SHARED FILES LOCATION
Windows Client
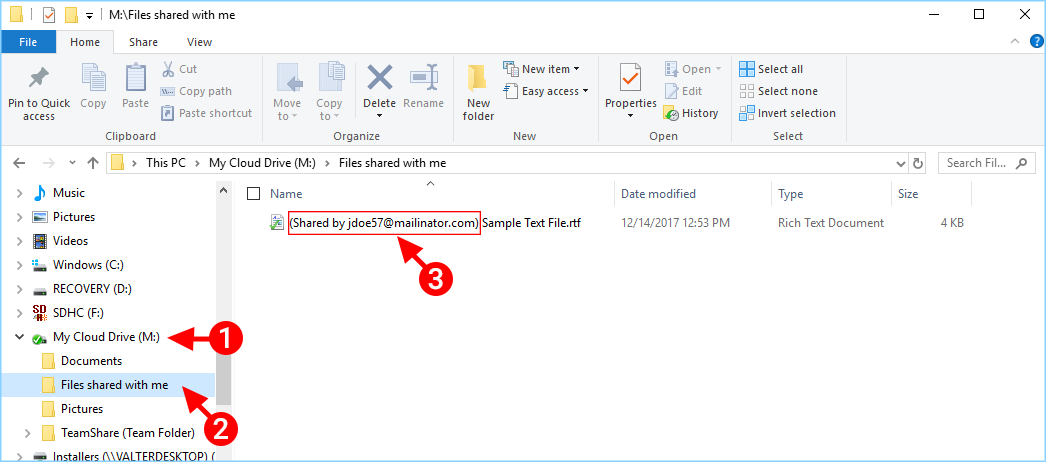
In the Windows Client you can access shared files by using windows explorer to navigate to the Cloud Drive (1) where you will find any shared files listed (2) with information about who shared (3) the file with you.
WINDOWS CLIENT SHARED FILES LOCATION
If the user has write permission to the folder shared, he can modify the files in the folder.